목차
~~Title: CSS 시작 정보~~
레퍼런스
- 참고 사이트 : http://www.w3schools.com/css/
구문 형식
주석
/* ~ */
포함 시키는 방법
외부 파일을 읽어오는 방식
<head> <link rel="stylesheet" type="text/css" href="mystyle.css"> </head>
html 내부에 선언하는 방식
<head>
  <style>
  hr { color:sienna; }
  p { margin-left:20px; }
  body { background-image:url("images/back40.gif"); }
  </style>
</head>
인라인 방식
<p style="color:sienna;margin-left:20px">This is a paragraph.</p>
요소 선택
id 선택
- css에서 id는 '#'으로 시작된다.
- html 요소 중에 id 속성을 가진 것(들)을 선택한다.
- 한개 또는 하나 뿐인 요소를 선택한다.
<head>
  <style>
    #para1 { text-align:center; color:red; }
  </style>
</head>
<body>
  <p id="para1">Hello World!</p>
  <p>This paragraph is not affected by the style.</p>
</body>
class 선택
- css에서 클래스는 '.'으로 시작된다.
- 몇개의 요소를 동시에 선택할때 사용한다.
- html 상의 많은 요소에 같은 class를 정의해서 한번에 선택한다.
<html><head>
  <style>
    .center { text-align:center; } /* 모든 center 클래스 인것 */
  </style>
</head>
<body>
  <h1 class="center">Center-aligned heading</h1>
  <p class="center">Center-aligned paragraph.</p>
</body></html>
- 특정 html 요소만을 선택해, 변경할 수도 있다.
<html><head>
  <style>
    p.center { text-align:center; } /* p 구문에 center 클래스 인것 */
  </style>
</head>
<body>
  <h1 class="center">This heading will not be affected</h1>
  <p class="center">This paragraph will be center-aligned.</p>
</body>
</html>
Multiple Style Sheets
중복되었을때의 규칙
- 외부 css 파일에 읽어온다.
- html 내부에도 css 를 선언하였다.
- 결과 : 외부 css 내용에 내부 css내용이 덮어 쓰여진다.
예시
- 외부 파일에 선언된 css
h3 {
color:red;
text-align:left;
font-size:8pt; }
- html 내부에 선언된 css
h3 {
text-align:right;
font-size:20pt; }
- 최종 결과물 2번이 1번을 덮어썻다.
color:red;
text-align:right;
font-size:20pt;
중복되는 CSS의 순서
- 브라우져 내장
- 외부 파일로 선언된 css
- head 섹션에 추가된 css
- 인라인(각 html 태그에 추가된 css)
중복되는 순서를 이해하고 있어야 어느 css가 적용될지 예상할 수 있다.
CSS Advanced
CSS 그룹핑과 Nesting (중첩)
셀렉터를 한번에 모아서 선택할 수 있다.
h1,h2,p {
  color:green;
}
중첩( Nesting )
셀렉터가 이미 있는 셀렉터에 대해서 스타일 변경이 가능하다.
/* (1) p 태그에 대한 스타일 정의 */
p {
  color:blue; text-align:center;
}
/* (2) id="marked" 로 ID가 선언된 부분에 대한 셀렉터 */
.marked {
  background-color:red;
}
/* (3) p 태그를 사용하면서, "marked"로 아이디가 선언된 항목에 대한 스타일 */
.marked p {
color:white;
}
샘플 html
<body>
  <p>This paragraph has blue text, and is center aligned.</p> <!-- (1)번 스타일 적용 -->

  <div class="marked"> <!-- (2)번 스타일 적용 -->
    <p>This paragraph has not blue text.</p> <!-- (3)번 스타일 적용, (2)번 위에 (3)번이 덧씌워진다. -->
  </div>

  <p>p elements inside a "marked" classed element keeps the alignment style, but has a different text color.</p> <!-- (1)번 스타일 적용 -->
</body></html>
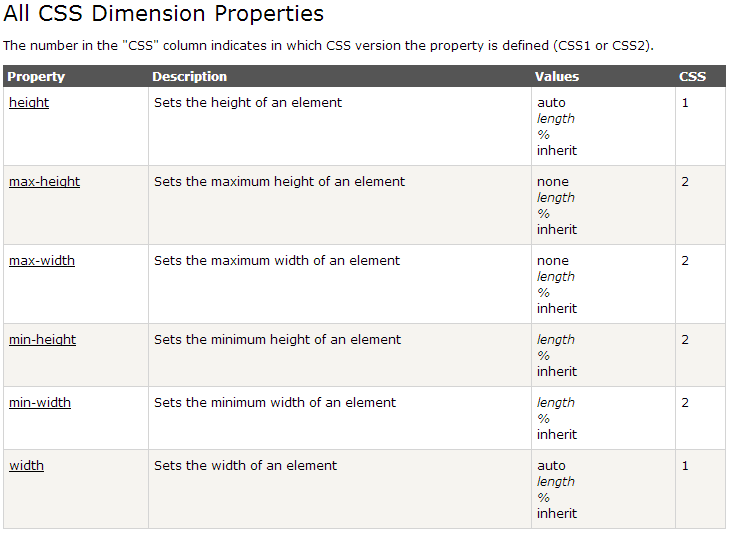
Dimension
Display, Visibility
요소 감추기 : display:none (or) visibility:hidden
<!DOCTYPE html>
<html>
<head>
  <style>
    h1.hidden {visibility:hidden;}
    h2.hidden {display:none;}
  </style>
</head>

<body>

  <h1>This is a visible heading</h1>
  <h1 class="hidden">This is a hidden heading1</h1>
  <p>h1.hidden 속성은, 보이지 않게만 할뿐 공간은 그대로 차지 한다.</p>

  <h2 class="hidden">This is a hidden heading2</h1>
  <p>h2.hidden 속성은, 감추기도 하고 공간도 차지 하지 않는다.</p>

</body></html>
Block, Inline 요소
- Block : 항목 또는 요소 전/후로 줄바꿈 기능 또는 화면 전체 너비를 사용하는 태그
- <h1>
- <p>
- <div>
- inline : 항목 또는 요소 전/후로 딱 필요한 만큼만 사용하는 태그
- <span>
- <a>
이런 성향의 요소를 다른 방식으로 출력하게 만들 수 있다.
<li> 블럭 엘리먼트를 인라인 엘리먼트처럼 표시한다.
<html>
<head>
  <style>
    li{display:inline;}
  span{display:block;}
  </style>
</head>
<body>

<p>li 요소들을 메뉴처럼 좌->우 방향으로 배열한다:</p>
<ul>
<li><a href="/html/default.asp" target="_blank">HTML</a></li>
<li><a href="/css/default.asp" target="_blank">CSS</a></li>
<li><a href="/js/default.asp" target="_blank">JavaScript</a></li>
<li><a href="/xml/default.asp" target="_blank">XML</a></li>
</ul>

<p>span을 사용해도 줄바꿈이 되도록, display속성을 변경한다.</p>
<h2>Nirvana</h2>
<span>Record: MTV Unplugged in New York</span>
<span>Year: 1993</span>
<h2>Radiohead</h2>
<span>Record: OK Computer</span>
<span>Year: 1997</span>

</body></html>
z-index
z-index
z order를 결정하여 오브젝트간의 가림 상태를 정한다.
사용하기 위해서는 조건이 필요하다.
position으로 위치를 정하거나position: absolute,position: relative,position: fixed,position: sticky
display:flex사용된 오브젝트의 자식 오브젝트
- 일반적인 경우라면,
position: relative사용하고z-index를 쓰면 될 것 같다.
CSS Syntax
z-index: auto|initial|inherit| (number);
JavaScript syntax
object.style.zIndex="-1"
Positioning
- 구성요소(element)를 배치할 수 있는 기능.
- 다른 엘리먼트 뒤에 놓거나 표시할 컨텐츠가 너무 클때 어떻게 보일 것인지 변경 할 수 있다.
- 배치는 top/bottom/left/right 를 가리키는 속성(프로퍼티Properties)이 있고,
- 배치명령어에 따라 다르게 동작한다.
Static
html 엘리먼트의 기본 값. 일반적인 문서 배치 흐름에 따라 자연 배열 된다. (좌→우, 위→아래)
top/bottom/left/right 프로퍼티가 적용되지 않는다.
Fixed
브라우져 화면을 기준으로 고정된 위치에 위치시킨다.
<html>
<head>
<style>
p.pos_fixed {
position:fixed;
top:60px; right:65px;
background: red;
}
</style>
</head>
<body>

<p class="pos_fixed">Some more text</p> <!-- 오른쪽에 텍스트가 위치한 것을 볼 수 있다. -->

<p><b>Note:</b> IE7 and IE8 supports the fixed value only if a !DOCTYPE is specified.</p>
<p>Some text</p><p>Some text</p><p>Some text</p><p>Some text</p><p>Some text</p><p>Some text</p><p>Some text</p><p>Some text</p><p>Some text</p><p>Some text</p><p>Some text</p><p>Some text</p><p>Some text</p><p>Some text</p><p>Some text</p><p>Some text</p>
</body>
</html>
Relative
relative 요소는, 엘리먼트가 원래 배치 되어야 할 위치를(Static 타입으로 배치될 위치) 기준으로 배치된다.
<html>
<head> <style>
h2.pos_left {
  position:relative;
  left:-40px;
}
h2.pos_right {
  position:relative;
  left:50px;
}
</style> </head>

<body>
<h2>This is a heading with no position</h2>
<h2 class="pos_left">원래 위치에서 -40px</h2>
<h2 class="pos_right">원래 위치에서 +50px</h2>
</body>
</html>
Absolute Positioning
브라우져 화면상의 절대 좌표값으로 배치된다. 브라우져 화면을 기반이 아니라, 최초의 엘리먼트를 기준으로 배치 되는데 그게 <html> 태그이기 때문에 브라우져 스크린을 기준으로 한다고 봐야 한다.
<html>
<head> <style>
h2 {
position:absolute;
left:100px;
top:150px;
}
h2.sub {
position:absolute;
left:40px;
top:50px;
}
</style> </head>

<body>
<h2>This is a heading with an absolute position</h2>
<h2 class="sub">2nd head (h2+.sub)</h2>
<p>With absolute positioning, an element can be placed anywhere on a page. The heading below is placed 100px from the left of the page and 150px from the top of the page.</p>
</body>

</html>
Overlapping Elements
*z-index* 속성을 사용해서, 엘리먼트를 겹치게 보이게 할 수 있다.
<html>
<head> <style>
img {
  position:absolute;
  left:0px; top:0px;
  z-index:-1;
}
</style> </head>

<body>
<h1>This is a heading</h1>
<img src="w3css.gif" width="100" height="140" />
<p>Because the image has a z-index of -1, it will be placed behind the text.</p>
</body>
</html>
Floating
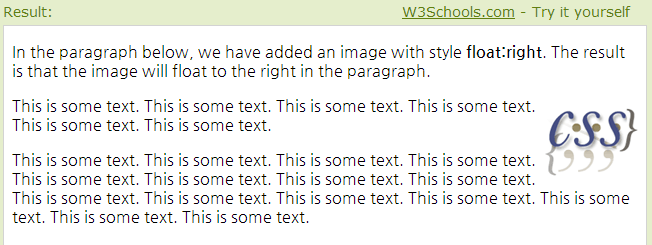
html 요소엘리먼트,element를 좌우로 이동시키거나, 다른 요소를 둘러 쌓을 수도 있다.
이미지를 배치하는 작업에 자주 사용되며, 레이아웃에 대한 작업을 할 때도 요긴하게 사용된다.
어떻게 동작하는가?
엘리먼트는 평행하게 플롯float하게 되는데, 위/아래 배치는 되지 않는다.
float 속성이 정해진 엘리먼트는 가능한 가장 왼쪽, 가장 오른쪽에 배치 된다.
- float 속성이 있는 엘리먼트 다음의 엘리먼트는 float-엘리먼트 중심으로 둘러쌓이게 된다.
- float 속성이 있는 엘리먼트 이전의 엘리먼트는 영향을 받지 않는다.
<html>
<head>
<style>
img { float:right; }
</style>
</head>

<body>
<p>In the paragraph below, we have added an image with style <b>float:right</b>. The result is that the image will float to the right in the paragraph.</p>
<p>
<img src="logocss.gif" width="95" height="84" />
This is some text. This is some text. This is some text.
This is some text. This is some text. This is some text.
</p>
<p>This is some text. This is some text. This is some text.
This is some text. This is some text. This is some text.
This is some text. This is some text. This is some text.
This is some text. This is some text. This is some text.
This is some text. This is some text. This is some text.</p>
</body>

</html>
Floating 엘리먼트를 여럿 배치할때
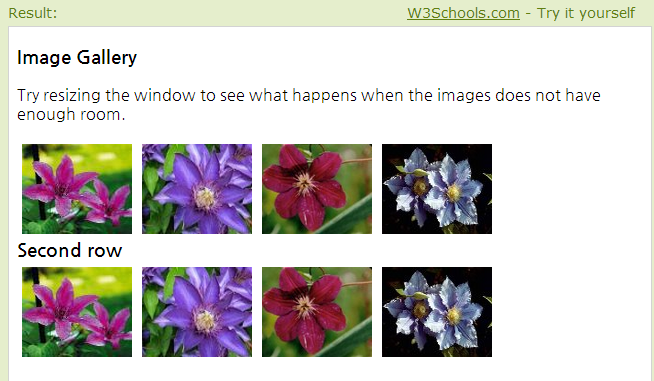
화면상에 여유 공간이 있는한 float 정해진 방향으로 배열된다.
아래 코드는, .thumbnail 클래스를 정의하고 이미지 속성에 반영하는데
- 이미지 태그 각각 사이즈를 정해도 변경되지 않고, .thumbnail 크기로만 변경 된다.
- float:left 속성 때문에 가능한 왼쪽으로 가려고 배열을 좌→우로 진행된다.
<html>
<head>
<style>
.thumbnail
{
float:left;
width:110px;
height:90px;
margin:5px;
}
</style>
</head>

<body>
<h3>Image Gallery</h3>
<p>Try resizing the window to see what happens when the images does not have enough room.</p>
<img class="thumbnail" src="klematis_small.jpg" width="107" height="90">
<img class="thumbnail" src="klematis2_small.jpg" width="107" height="80">
<img class="thumbnail" src="klematis3_small.jpg" width="116" height="90">
<img class="thumbnail" src="klematis4_small.jpg" width="120" height="90">
<img class="thumbnail" src="klematis_small.jpg" width="107" height="90">
<img class="thumbnail" src="klematis2_small.jpg" width="107" height="80">
<img class="thumbnail" src="klematis3_small.jpg" width="116" height="90">
<img class="thumbnail" src="klematis4_small.jpg" width="120" height="90">
</body>
</html>
float 속성 제거
한번 float 속성이 반영되면, 다음 엘리먼트들이 그 주위를 둘러 쌓으려고 하는 속성이 있다. 이런 float 속성 효과를 제거하려면 clear 프로퍼티를 사용해서 한번 정리할 수 있다.
.text_line { clear:both; }
예제
<html>
<head> <style>
.thumbnail {
float:left;
width:110px; height:90px;
margin:5px;
}
.text_line {
clear:both; margin-bottom:2px;
}
</style> </head>

<body>
  <h3>Image Gallery</h3>
    <p>Try resizing the window to see what happens when the images does not have enough room.</p>
    <img class="thumbnail" src="klematis_small.jpg" width="107" height="90">
    <img class="thumbnail" src="klematis2_small.jpg" width="107" height="80">
    <img class="thumbnail" src="klematis3_small.jpg" width="116" height="90">
    <img class="thumbnail" src="klematis4_small.jpg" width="120" height="90">
  <h3 class="text_line">Second row</h3>
    <img class="thumbnail" src="klematis_small.jpg" width="107" height="90">
    <img class="thumbnail" src="klematis2_small.jpg" width="107" height="80">
    <img class="thumbnail" src="klematis3_small.jpg" width="116" height="90">
    <img class="thumbnail" src="klematis4_small.jpg" width="120" height="90">
</body></html>
결과
- Second row 부분에서 float 효과가 사라지고, 엘리먼트 배열이 새롭게 시작되었다.
Align
- block 엘리먼트를 수평으로 어떻게 정렬하는지 알아봅
- h1, p, div 와 같은 태그가 blockfull-width에 줄바꿈 기능이 있는 엘리먼트를 만든다.
- 코드와 결과 화면만 정리.
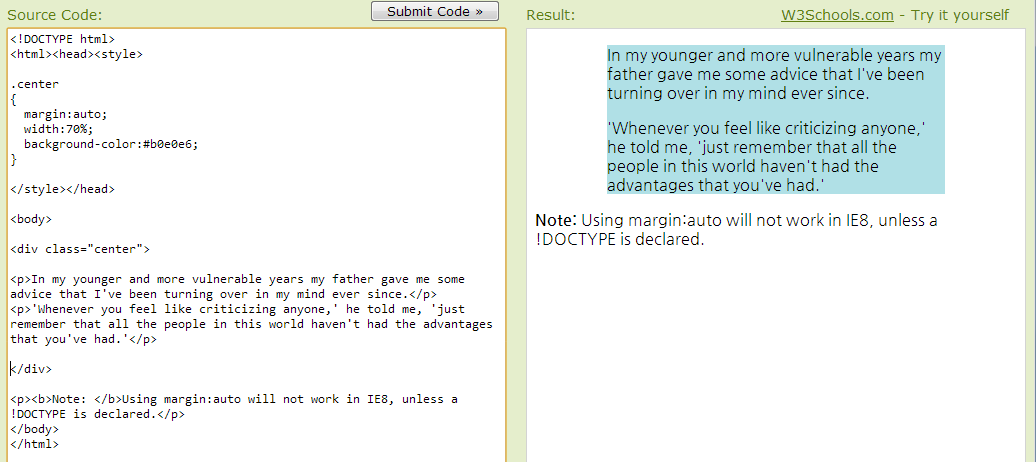
Center Aligning Using the margin Property
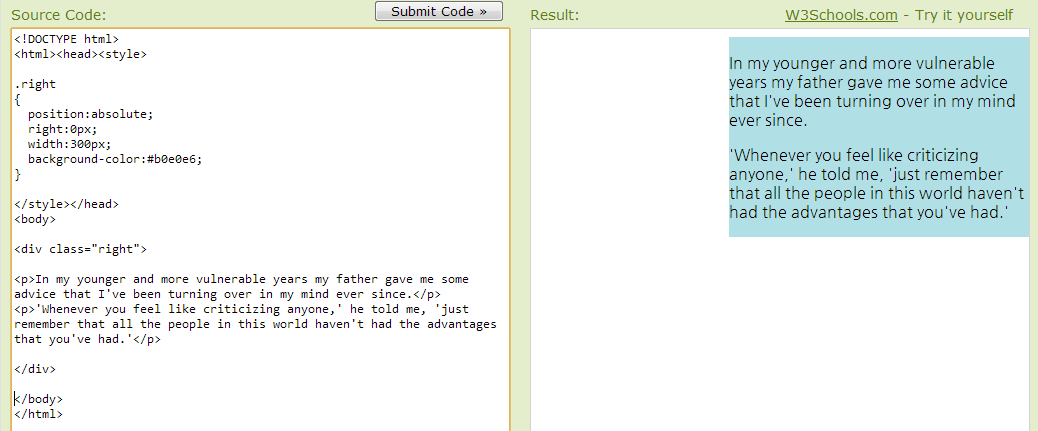
Left and Right Aligning Using the position Property
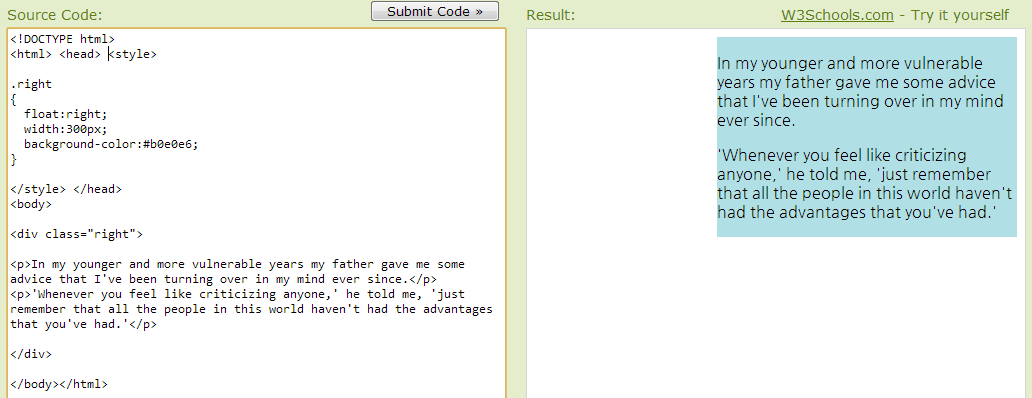
Left and Right Aligning Using the float Property
Navigation Bar
Image Gallery
Image Opacity
Image Sprite
Media Types
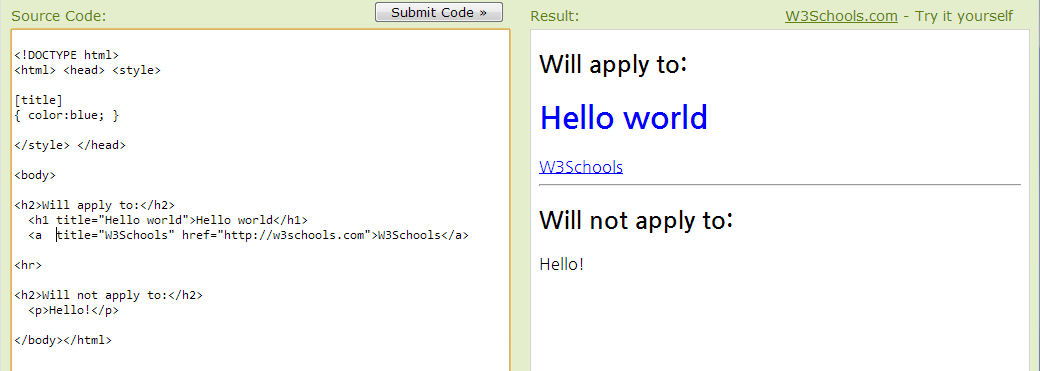
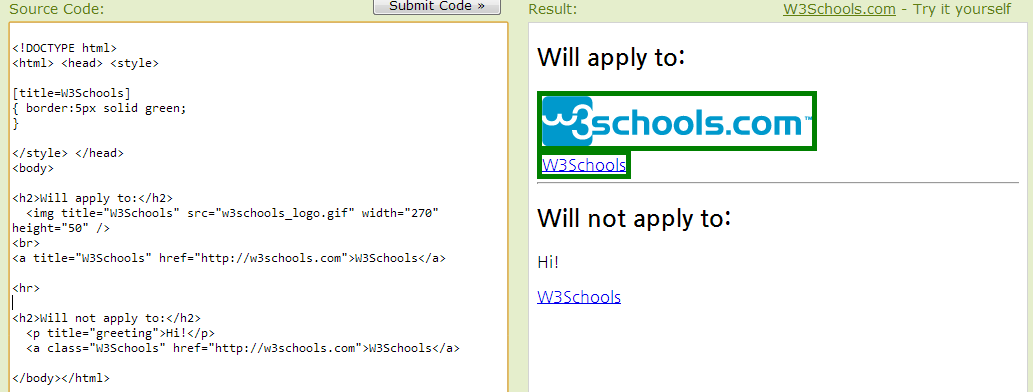
Attribute Selectors
class, id 외에도 “html 엘리먼트” 의 속성까지 포함한 일부분을 스타일 변경 키워드로 인식해서 사용할 수 있다.

